How to: Hair bow

Are you bored with your everyday look? We have found a quick and easy way to take a style that's just a little too messy or not quite a complete look, to "wow you look adorable!" It is as easy as.. Put a Bow on it!
Follow our easy 8 step tutorial and you can have a bow for every look in your closet!
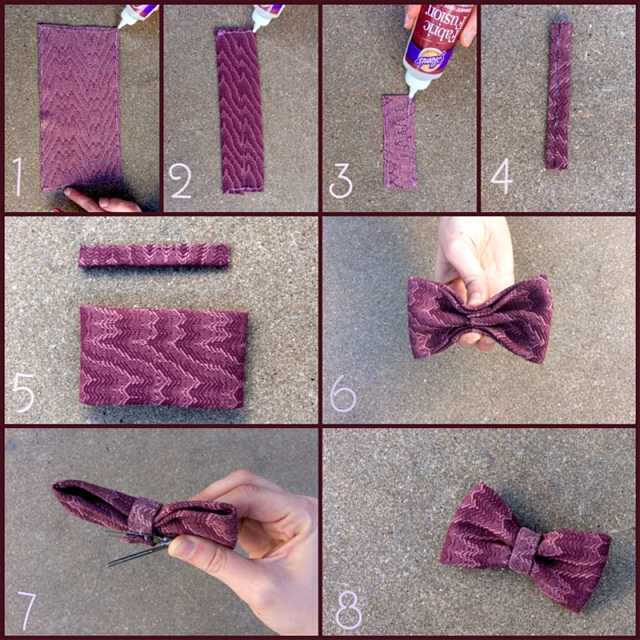
Step 1: Cut a large rectangular piece of fabric and glue along the edges on one side.
Step 2: Fold in like a hot dog (long and narrow), then glue along the short edges and fold those to meet in the center.
Step 3: Cut a smaller rectangular piece (this will be your center wrap) and glue the edges.
Step 4: Fold the edges to the center as seen above. (hot dog style again)
Step 5: Admire your work :) You are halfway there!!
Step 6: Scrunch the bigger piece in the center.. It already looks like a bow!
Step 7: Glue one side of the smaller piece and wrap it around the center of the bow.
Tip! (Before the glue drys, slide your clip under the center piece.)
Step 8: You've finished! But don't get ahead of yourself, the glue needs to dry before putting it in your hair.
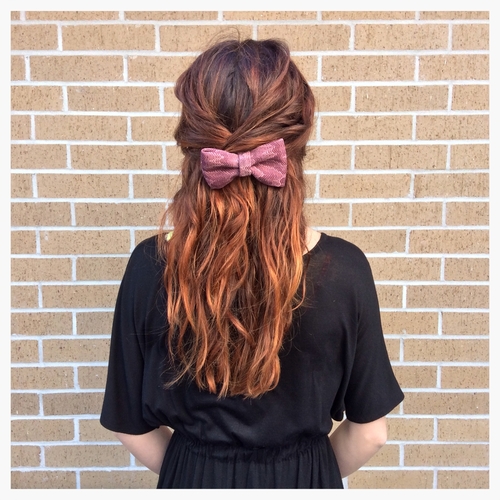
Here are a few examples of hairstyles jazzed up with precious bows >>>------>